
Are you looking into lining interior walls? If so, then you may be a good DIYer. Although this is a fair-sized job, but it still requires the skills and expertise of a professional handy person. We have given an easy step-by-step guide that you can follow to come up with an appealing finishing that will make your friends to look around and admire your work, whenever they will visit you.

Before you start the work, match the linings or lath and plaster laid over the timber. These often provide framing, bracing along with an appealing wall finishing. You will require a skilled engineer or company like Interior Drywall Solutions before replacement. You can also consult a doctor, if you are unsure when removing old interior wall linings.
Note – When plasterboard is needed to offer bracing performance, it becomes a Restricted Building Work and must be performed or supervised by a Certified Building Practitioner.
Gib board supply should be handled with care, as it is an essential finishing material. You must not sit or walk on stacks of plasterboard. Always carry plasterboard on its edge. Plasterboard Sheets are easier to carry as well as less likely to break or crack. When taking out a sheet from the stack, make sure not to drag a sheet across the one that is placed below as it can deteriorate the face paper.
The plasterboard sheets must be stacked in a neat and clear flat stack, to prevent any damage to its edges, surfaces and ends. The stacks of plasterboard must be restricted to only 20 stacks of 20 sheets and must be stored on a non-concrete surface to reduce the risk of structural damage because of point loading. In case if the storage of plasterboard is done on a new concrete floor, it should be either placed in an elevated position or on a piece of waterproof polythene sheet so as to avoid picking up moisture from the concrete.
Wall Preparation is more important than anything else to accomplish a good finish. So before applying plasterboard, you must take your time to ensure that the surface is as flat and straight as possible.
The plasterboard must be fixed horizontally, so that the joints are below eye-level. Consequently, if there are any imperfections, it will be hardly visible. And if joints are completed slightly raised, any striking light from lights or windows will not show a shadow line. Gluing and screwing decreases the number of mechanical fixings in the face of the plasterboard, so reducing the number of possible defects or imperfections which may be caused by problems such as ‘popping’. Popping is often caused by wet timber.
Horizontal fixing of the board is done by using square edge/taper edge as it makes installation of cove/cornice and skirting very easy. Typical stud spacing must be at a maximum of 16”. When fixing the end joints horizontally, these should be staggered a minimum of one stud apart, 600mm.
For traditional or existing homes, trimmed plasterboard sheets are required for stud spacing, when fixing vertically.
Note- Avoid making joints above, below or within 200mm of the corners of doors or windows.
You must use the following method, for cutting out the openings like an electrical outlet or switch box:
The best method of fixing Gib Board is using the plasterboard screws and glue. The Plasterboard screws should be used around the circumference of the sheet and for the rest of the areas that directly touch the wall framing, glue should be used.
For appropriate and smooth surface, use GIBFix® All Bond or GIBFix®. Check that the framing is neat and free from both oil and dust. Make sure to apply adhesive at suitable spacing by using a gun. Use a glue daub of approx. Same diameter like that of the framing timber stud. After using glue over the sheet, install it immediately to prevent the skinning of glue, which may result in poor adhesion.
Grasp the sheet firmly against the framing, when fixing the screws in it. Install the plasterboard screws, below the sheet while leaving the paper intact.
When installing the plasterboard vertically, start from the window or door. First cut the first sheet to install so that all the joints are further than 200mm from the windows or doors corner. Also make sure that the joints extend to a minimum of 200mm and beyond the corner of the windows or doors edge.
Use Architraves for the best practice. However, there are a few effective tips, if you are restricted to the use of grooved jambs and want the best results.
For fixing the sheets at the internal corner, butt the second sheet against the first and then tighten the second sheet to the stud.
In order to attach the sheets at an external corner, join the end of the second board over the end of the first one. Ensure that the sheets overlap each other neatly and the second board does not extend over the face of the first. You must tighten both the sheets to a common stud. Once the sheets have been installed in place, fix the plastic or metal external corners in position to provide a neat edge for stopping. It will help in protecting the edges of the board and also make the board stopping easier.
Before commencing the GIB stopping, check that all the fixings, nails or screws are seated below the board surface. If there are some areas, which are more than 2mm deeper, fill them with a setting compound and leave it to dry.
Once the sanding is done, draw the imperfections and defects with a pencil, and then again touch-up these areas with compound. Leave it to dry and sand. You may repeat this process until you get the desired finish.
The end of year 2018 is just around the corner which means the holiday season is approaching really quickly....
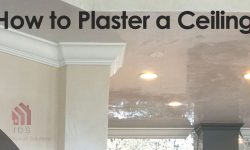
If the plaster on your ceiling needs redecoration, it might be the right time to learn some plastering tips....
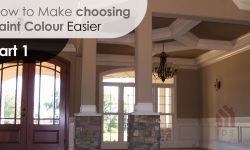
When it comes to deciding a paint colour for your home interior, you may find it very complicated. Of...

Choosing a perfect paint colour for the interior of your house is simply much more than selecting a shade...

![]()
![]()
![]()


